
Webpage for the University of Chicago Data Science Clinic
Hosted on GitHub Pages — Theme by orderedlist
Slurm
This document contains a basic introduction to how to use Slurm on the cluster. This should not be considered a complete reference and if you are looking for additional references take a look at UChicago’s Slurm set up can be found at the UChicago CS Slurm How To Page. Note that this reference is for a slightly different cluster than the DSI cluster, but nearly all the information should be the same.
There are two modes of using Slurm: (1) interactively (what this document details) and (2) non-interactively (sometimes called batch).
Prerequisites:
Before starting this, make sure that you are:
- Make sure that you are familiar with using a Unix command line. You can find some information here.
- Make sure that you have completed all steps in the ssh-cluster-connection doc.
Connecting to the cluster, cluster layout and definitions:
- Understand the language of the cluster:
- Cluster: A collection of connected computers which are set up in to share resources (compute, hard drive and memory) so they behave as a single system. These are powerful computers with GPUs, powerful CPUs, and/or lots of memory.
- Nodes: A node is a single computer within the cluster.
- Login Nodes: A node designed to manage logins, no computing jobs should be run on them. In the DSI cluster these nodes begin with
fe. - Compute Nodes: A node which was created for high-performance computing. They have powerful GPUs, CPUs and lots of memory. On the DSI cluster there are multiple designations, such as
g, h, i, j, k, landm. Nodes with matching prefixes have similar hardware. - Slurm Slurm is a queue management system which manages access and resources among users of a system. When a user wishes to run an intensive job they submit a resource request and when the resources become available Slurm provides access.
- Connect to the login node of the cluster using
ssh fe.ds.- If this works you should see a change in your command prompt. If there are any notifications or messages from
sshthis probably means that you did not connect.
- If this works you should see a change in your command prompt. If there are any notifications or messages from
- Verify that you are in your home directory using the
pwdcommand. Running this command should return/home/USERNAMEwhereUSERNAMEis your CNET ID. - Understand where data should be place:
- Home directories are limited to 20 GB of storage.
- Home directories are only accessible by you, so they should be not be used for any data that needs to be shared with anyone else
- The directory
/net/projectsor/net/projects2shows shared project directories. These are limited access and you need to contact techstaff if you do not have access to a directory required for a project. Unix user groups are used to manage access. This is the primary location where data should be placed. - The directory
/net/scratchand/net/scratch2are open areas where anyone can put anything. Note that this is ephemeral. Any data put here may be deleted at any time. - All of the
/netdirectories are network storage drives and are available on any node in the cluster.
Cloning a Repository on the cluster
A common use of the cluster is running code from a github repository on it. If you have followed the instructions on how to set up ssh for the cluster you should abel to quickly clone any repo you have access to on github.
- Connect to the login node via
sshif you have not already. - Verify that you can access github by typing
ssh -T git@github.comwhich should return your username. If it does not it means thatsshis not set up properly. Please use thesshdocs above to identify which system is not st up correctly. - Verify your current working directory by typing
pwdand checking to make sure it says\home\CNET ID. If this is not your current working directory type incdto return to your home directory. - Go to the repository github page, click the dropdown on the green button that says ‘Code’, select ‘SSH’ and copy the value.
- Type in
git clone COPIED_VALUEto clone the repo to your home directory. Verify that there were no errors printed and that the repo was properly cloned.
Install Conda for Environment Management
- Connect to cluster via
ssh - In a terminal on the cluster:
wget https://repo.anaconda.com/miniconda/Miniconda3-latest-Linux-x86_64.sh -O ~/miniconda.sh
bash ~/miniconda.sh
You can accept the defaults. Make sure you select yes when it asks to run conda init. This will ensure conda is activated by default. re-open and close your terminal.
- Create a new environment
conda create --name PROJECT_NAME python=3.11
conda activate PROJECT_NAME
pip install -r requirements.txt
Where
PROJECT_NAMEis the name of the project you are working on. Now when you log into ai cluster, just make sure you runconda activate PROJECT_NAME. -
Ensure VS Code uses the correct python environment. When a python file is open and selected, click the Python version number on the bottom right and select the interpreter for PROJECT_NAME. If it is not listed, the path is:
/home/USERNAME/miniconda3/envs/PROJECT_NAME/bin/pythonwhereUSERNAMEis your CNET ID. - Ensure VS Code uses the correct kernel for Jupyter notebooks. First, install
ipykernelin thePROJECT_NAMEenvironment:conda install -n PROJECT_NAME ipykernel --update-deps --force-reinstallWith a Jupyter notebook open, click the Python version number in the upper right and select the kernel for
PROJECT_NAME. You may need to refresh the list of available kernels using the icon in the upper right of the menu. - You should now be at a point where you can easily connect to the cluster with VS Code, use jupyter notebooks, and attach to compute nodes for more intensive jobs. This is enough for a lot of tasks, but if you become bothered by long running jobs crashing due to internet connection outages or running out of time on the compute node you will need to leverage
sbatch.
Set up VS Code to use the cluster
The instructions below provide specific instructions for setting up VS Code. Before preceding, please make sure that it is installed.
Step 1: Connect to the Login Node with VS Code
Traditionally, one would ssh in a terminal and be restricted to command-line text editors like Vim. We can use the extension, Remote - SSH allows us to act like we are developing on our local machine as normal for the most part and has less of a learning curve. Information on the extension can be found here.
-
Install
Remote - SSH. Click ‘Extensions’ on the menu at the left side of VS Code (its icon is four squares with the top right one pulled away). Search for and installRemote - SSH. - We want to allow common extensions to be used on the cluster. Open the command palette (ctrl+shift+p / command+shift+p / View -> Command Palette…) and search for
Open User Settings (JSON). If it is empty, paste the following: -
{
"remote.SSH.defaultExtensions": [
    "ms-toolsai.jupyter",
    "ms-toolsai.jupyter-renderers",
    "ms-python.python",
    "ms-python.vscode-pylance"
]
}
Otherwise, make sure to add a comma to the end of the current last item and add the following before the }:
    "remote.SSH.defaultExtensions": [
        "ms-toolsai.jupyter",
        "ms-toolsai.jupyter-renderers",
        "ms-python.python",
        "ms-python.vscode-pylance"
    ]
- Follow the instructions here to set up with the following modifications:
- In “Connect to a remote host”, try
Remote-SSH: Connect to Host...and you should seefe.dsas an option. Select it. Otherwise, you can try typing infe.ds. - (If you are asked, though sometimes this will be detected by VS Code) The type of server is Linux.
- In “Connect to a remote host”, try
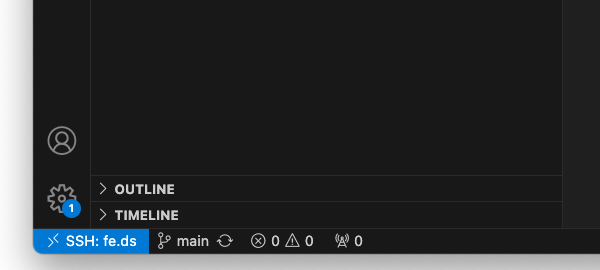
- The (usually green) box at the bottom left of your VS Code window should now say
SSH: fe.dsto signify you are using the SSH extension and connected to the hostfe.dsas in the image here:
- Assuming you have correctly cloned the repo on the cluster you can you click
FilethenOpen Folderand select your repository folder. - Close the window. Now if you open a new VS Code window and select from recent, the one called `REPOSITORY_NAME [SSH: fe.ds] will take you right to the login node of the cluster with your previous configuration.
| Never run any large code jobs when connected the login node. All python code should be run only after connecting to a compute node! |
Step 2: Connect to a Compute Node with VS Code
- Open a terminal / command prompt. Connect to the cluster using
ssh fe.ds. - You should now be connected to the cluster in a login node, which is fine for small tasks and coding. To get access to a powerful compute node, you must request access through Slurm. Request an interactive session with a command like:
srun -p general --gres=gpu:1 --pty --mem 1000 -t 90:00 /bin/bash. Once you have been your request has been granted, your command prompt will change to something likeUSERNAME@hostnamewhere hostname is probably likeg004. - Now your terminal is connected to a compute node. (NOTE: If you did this in a terminal in VS code, just that terminal will connect to a compute node. The rest of VS Code functionality will be run on the login node still. To connect VS code features like python debug and notebook editing to the compute node follow along).
- Back in VS Code, open the command palette (ctrl+shift+p / command+shift+p / View -> Command Palette…), search for
Remote-SSH: Connect to Host.... Select it and type in as your hostHOSTNAME.dsreplacing theHOSTNAMEwith the hostname from above. - Your VS Code should now be connected to the compute node. To verify the You’ll have to open the repository folder (see below instructions for cloning). But now you can take advantage of the computational power from the node and the nice features of VS Code (using notebooks, python debugging, etc.)
Appendix
Common errors and troubleshooting moved to Troubleshooting